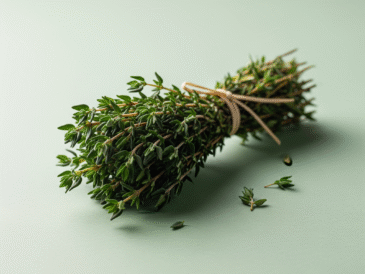
Are you noticing bees flying frantically around your garden, hovering near puddles or wet leaves in search of water? You’re not alone. As temperatures rise and rainfall decreases, pollinators like bees often struggle to find reliable, clean water sources. This puts their health — and the balance of your garden — at risk.
The good news? There’s a simple, low-cost DIY solution that not only benefits bees but also improves your sustainable landscaping and adds visual charm to your backyard: the Marble Bee Watering Station.
This easy project promotes eco-conscious gardening, supports local ecosystems, and aligns beautifully with those searching for natural backyard upgrades, environmentally friendly home ideas, or ways to attract beneficial insects.
🌍 Why Do Bees Need Water?
We often think of bees as nectar collectors, but water is just as important to their survival. Bees drink water to:
- Regulate their body temperature
- Dilute stored honey
- Feed developing larvae
- Cool the hive during hot weather
Without safe access to water, bees risk dehydration, reduced productivity, and even colony collapse.
🧠 Did you know?
Bees can drown in just a few millimeters of water if there’s nowhere to land. That’s why a safe, shallow water source is crucial — and often overlooked in most gardens.
🛠️ DIY Bee Watering Station: What You’ll Need
This budget-friendly project requires minimal tools and just a few household items. Here’s your simple materials checklist:
- 🥣 Shallow bowl or saucer (ceramic, glass, or terra cotta work great)
- 🔵 Glass marbles, decorative stones, or large pebbles
- 💧 Clean water (tap water is fine; rainwater is better)
If you want to upgrade your setup, you can also include:
- 🌞 A solar fountain for gentle bubbling
- 🌼 A stand or pedestal to elevate the bowl
- 🌿 Surrounding flowers or herbs to attract more bees
📋 Step-by-Step Instructions
Follow these simple steps to make your garden more inviting to pollinators:
✅ Step 1: Choose a Shallow Container
Use a container no more than 1–2 inches deep. Bees can’t swim, so it’s important that they can stand safely while drinking.
Example containers: old saucers, lids, pie plates, shallow plant trays.
✅ Step 2: Add Marbles or Stones
Fill the dish with decorative glass marbles or smooth river rocks. These act as safe landing pads so the bees can access the water without falling in.
Tip: Using colorful marbles not only makes the station more appealing to bees — it enhances your garden decor!
✅ Step 3: Pour in Water
Add water slowly, making sure the tops of the marbles remain above the water surface. This allows bees to perch and drink comfortably.
Avoid overfilling — too much water removes the landing surface and increases drowning risk.
✅ Step 4: Place in a Sunny, Flower-Rich Spot
Set the dish in a bright area of your yard, ideally near bee-friendly plants such as lavender, sunflowers, borage, or mint.
Placing your station near a raised flower bed or vegetable garden can also improve pollination and crop yield.
🔄 How to Maintain Your Bee Watering Station
Like any garden feature, this setup needs a little attention:
- 💧 Refill daily during hot weather to ensure constant water access
- 🧽 Clean the bowl weekly to prevent algae and mosquito eggs
- ❄️ Bring indoors in freezing weather to avoid cracking and frost damage
🦋 Added Benefits: Not Just for Bees!
This project doesn’t just help honeybees. You may attract:
- Butterflies
- Ladybugs
- Hoverflies
- Mason bees
- Other native pollinators
These insects contribute to natural pest control, better fruit production, and a more balanced ecosystem.
💡 Want to Go the Extra Mile?
If you’re passionate about sustainable gardening or wildlife conservation, here are a few add-ons you can try:
CONTINUE READING IN PAGE 2