You’ve vacuumed, organized, and wiped down every square inch, and while you’re sitting there feeling proud the area sparkles, you see your kitchen cabinets and it feels wrong.
I get it. In fact, you take a step back, overjoyed at how your space sparkles, but then you notice that irritating little void between your cabinets. And, boom, now that spot feels huge, especially with guests. All of sudden, light cabinets that felt fresh and modern, start to feel dark or raw on the edge. And yes, your eye goes right there.
Good news! The fix is ridiculously easy. It may take you ten minutes and you need a marker, painter’s tape, and if you’re a “to the millimeter” person, a utility knife. The kind of trick that makes you say “Why didn’t I do that ages ago?”
Why Cabinet Gaps Stand Out So Much
Cabinet gaps are tricky. Most of the time, you don’t see them until one day you do, and then you can’t unsee it.
And here’s the irony: even expensive cabinets fall victim to these. Wood changes, doors shift, things become a bit misaligned. Those small areas are typically okay, but with white, cream, or light gray cabinets, it’s like a spotlight on a marker line.
In worst-case scenarios, you do not get the same angle on the inside edge (especially if it’s uncoated wood) so you get a stripe across the cabinet gallery. Subtle, but not much fun. And if you’re concerned about what your guests see while pouring out wine, you already know exactly where their eyes are going to go.

The Marker and Tape Trick to the Rescue
This hack saved my life at my last rental. There were some troubling gaps on my white shaker cabinets that had me looking up how to realign cabinet doors, only to discover I was getting myself into cabinet hardware hell. I felt relieved when someone on TikTok suggested a solution like this for a quicker fix.
Here’s how:
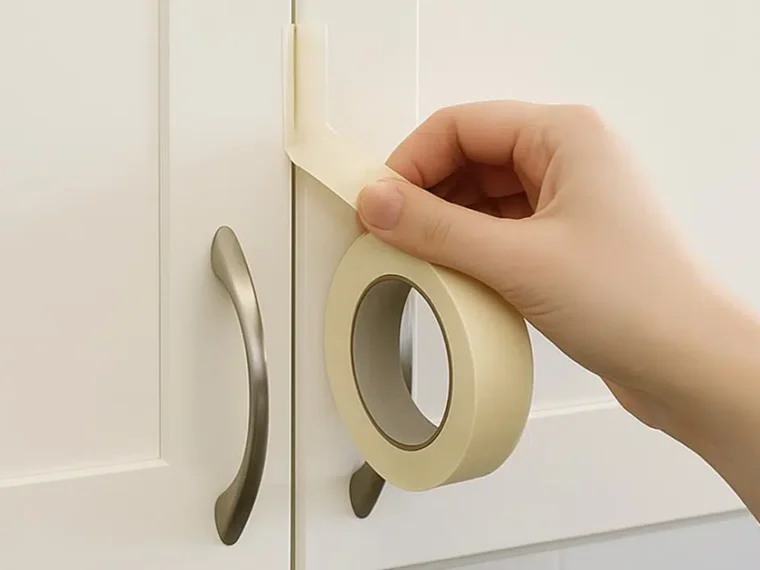
Step 1: Get some painter’s tape (masking tape works too) and run it down both sides of the cabinet gap. Basically, you are protecting the cabinet faces so you are just coloring the exposed edges. Make sure the tape is pressed down really well so the marker won’t bleed underneath.
Step 2: Grab a black permanent marker or, even better, a furniture touch-up pen, and color in the edges of the cabinet doors that create the gap. No need to go deep into the cavity, just color in the part that is visible when the cabinet faces are closed.
Step 2.5 (Optional but smart): If your tape strips meet in the middle, lightly cut through the seam with a utility knife or X-Acto blade before you pull it away. This will keep the line of marker crisp and not lifted by the tape.
Step 3: Slowly peel the tape off and admire your work. You no longer have the glaring pale lines you had before, but instead a clean, shadowy seam that follows the cabinet line beautifully.
Why Does It Work?
It almost seems ridiculous this works—fixing your kitchen with a Sharpie—but it’s surprisingly simple.
On purpose, you’ve taken away the eye’s focus on the crisp seam. Rather than fixating on a bright piece of wood or imperfections in the lines, it now appears as part of the cabinet. Think of it as eyeliner for your cabinets, less an enhancement and more a way to tie the whole look together.
Honestly, it checks all the boxes: renter-friendly, less than 30 minutes of effort, inexpensive, and if you change your mind, it just takes a little rubbing alcohol (or light sanding) to undo.
Upgrades if You Want to Get Fancy
continue reading in page 2